|
|
Post by sunbloquer on Oct 11, 2017 13:42:02 GMT
Hello and sorry for my English, i´m Spanish. I found this looking for information about the mailer and I thought it was a very interesting project to do it in full since basically the configuration of the house is the same, with dog included  . I'm a total noob but from what I've seen can be easy and entertaining, I've understood almost everything, but a doubt and apk application that controls everything? Does that also have to be programmed or is the apk available? Thank you EDIT: Sorry is OpenHAB  and I guess all the code to include everything as you show on your tablet is here for the forum, right? |
|
|
|
Post by papa on Oct 11, 2017 15:21:34 GMT
Welcome, sunbloquer, to DIY Home Automation. Your English is much better than my Spanish. We'll do our best to communicate. sunbloquer: "looking for information about the mailer and I thought it was a very interesting project to do it in full since basically the configuration of the house is the same, with dog included" papa: It seems you saw the Uber Instructable & then came to this forum. Other than as inspiration, I recommend you stop using the Uber Instructable. This forum covers much that's in the Instructable & more, but in a more reliable fashion. You will be confused if you try to follow Uber Instructable instructions & instructions on our forum.sunbloquer: "is OpenHAB and I guess all the code to include everything as you show on your tablet is here for the forum, right?" papa: This forum uses OpenHAB to communicate with home automation devices for exchanging information & for control. Open source OpenHAB programming & documentation is at the OpenHAB site. Generally speaking one installs OpenHAB on your operating system, then configures OpenHAB with bindings, items, rules, & sitemap entries to communicate with devices & services (like ntp & weather). One can then access OpenHAB through a user interface on a web browser OR through a mobile device's OpenHAB app (iOS or Android). Our forum gives much detail on building the home automation devices & on the OpenHAB configuration to communicate with the devices.sunbloquer: "a doubt and apk application that controls everything?" papa: If I understand your question, you are asking if one can download & install a total package that takes care of everything. From what I know, this approach (which I have never used) offers more in one package than anything else. I believe one would still need to configure OpenHAB & (if mobile device access is desired) install an OpenHAB app. sunbloquer: "what I've seen can be easy and entertaining" papa: Actually beginners (which included me 2.75 years ago) have had trouble getting started with this project. It can help to have previous experience with attaching sensors etc. to Arduinos, Raspberry Pis, etc & with programming to communicate with the attachments. Also helpful: Using the Arduino IDE to program devices. If you choose to follow this forum's approach to DIY Home Automation, I strongly recommend you start with the ESP8266 or ESP8285 WiFi devices ( See this list). Such devices connect directly with OpenHAB via MQTT binding. The RFM69 radio devices require an added RFM69 gateway to communicate with OpenHAB. Beginners usually have difficulty getting the first node communicating with the gateway. The RFM69 devices are better that ESP82xx for some purposes (like sensors), but it's better for beginners to get experience with ESP82xx devices & then move on to RFM69. Study this thread carefully. It is my best effort so far on giving an overview of the possibilities & my recommendations on the best places to start to achieve success. |
|
|
|
Post by sunbloquer on Oct 12, 2017 10:50:37 GMT
papa: It seems you saw the Uber Instructable & then came to this forum. Other than as inspiration, I recommend you stop using the Uber Instructable. This forum covers much that's in the Instructable & more, but in a more reliable fashion. You will be confused if you try to follow Uber Instructable instructions & instructions on our forum.Okay. I will only follow the instructions of this forumpapa: Actually beginners (which included me 2.75 years ago) have had trouble getting started with this project. It can help to have previous experience with attaching sensors etc. to Arduinos, Raspberry Pis, etc & with programming to communicate with the attachments. Also helpful: Using the Arduino IDE to program devices. If you choose to follow this forum's approach to DIY Home Automation, I strongly recommend you start with the ESP8266 or ESP8285 WiFi devices ( See this list). Such devices connect directly with OpenHAB via MQTT binding. The RFM69 radio devices require an added RFM69 gateway to communicate with OpenHAB. Beginners usually have difficulty getting the first node communicating with the gateway. The RFM69 devices are better that ESP82xx for some purposes (like sensors), but it's better for beginners to get experience with ESP82xx devices & then move on to RFM69. Study this thread carefully. It is my best effort so far on giving an overview of the possibilities & my recommendations on the best places to start to achieve success. I will study the documentation well and will inform myself before you ask any questions that are surely already answered. Thank you very much, Papa, for the response and the information.
Greetings from Asturias (Spain) |
|
|
|
Post by sunbloquer on Oct 14, 2017 14:03:13 GMT
Hello everyone. I'm going to start my automation project and the first thing I want to do is the Node for Mailbox. To start making things difficult and despite the fact that papa and more users do not recommend starting with RFM69, in order to take the opposite I will start from the difficult way  If my English domain is a bit limited adding electronic technical language is even more, there is no choice but to help with the Google translator. I intend with this post to relate all the steps and procedures that I follow to carry out the project, that may help some undecided to decide, that will help me and I suppose that more people. Start by identifying materials for your purchase. Here in Spain is limited and there is no choice but to buy outside, I put links from Aliexpress because it is the store that I usually use. Currently I have a raspberry pi in operation with Weewx connected to a meteorological station Davis Vantage Vue MeteoquintesSTART 1.- Raspberry Pi with openhabian. Static IP, connected via a network cable to the router [15:26:43] openhabian@openHABianPi:~$ cat /etc/*release PRETTY_NAME="Raspbian GNU/Linux 8 (jessie)" NAME="Raspbian GNU/Linux" VERSION_ID="8" VERSION="8 (jessie)" ID=raspbian ID_LIKE=debian HOME_URL="http://www.raspbian.org/" SUPPORT_URL="http://www.raspbian.org/RaspbianForums" BUG_REPORT_URL="http://www.raspbian.org/RaspbianBugs" 2.- Start following the steps of this post Node for MailBox ( in red my doubts)
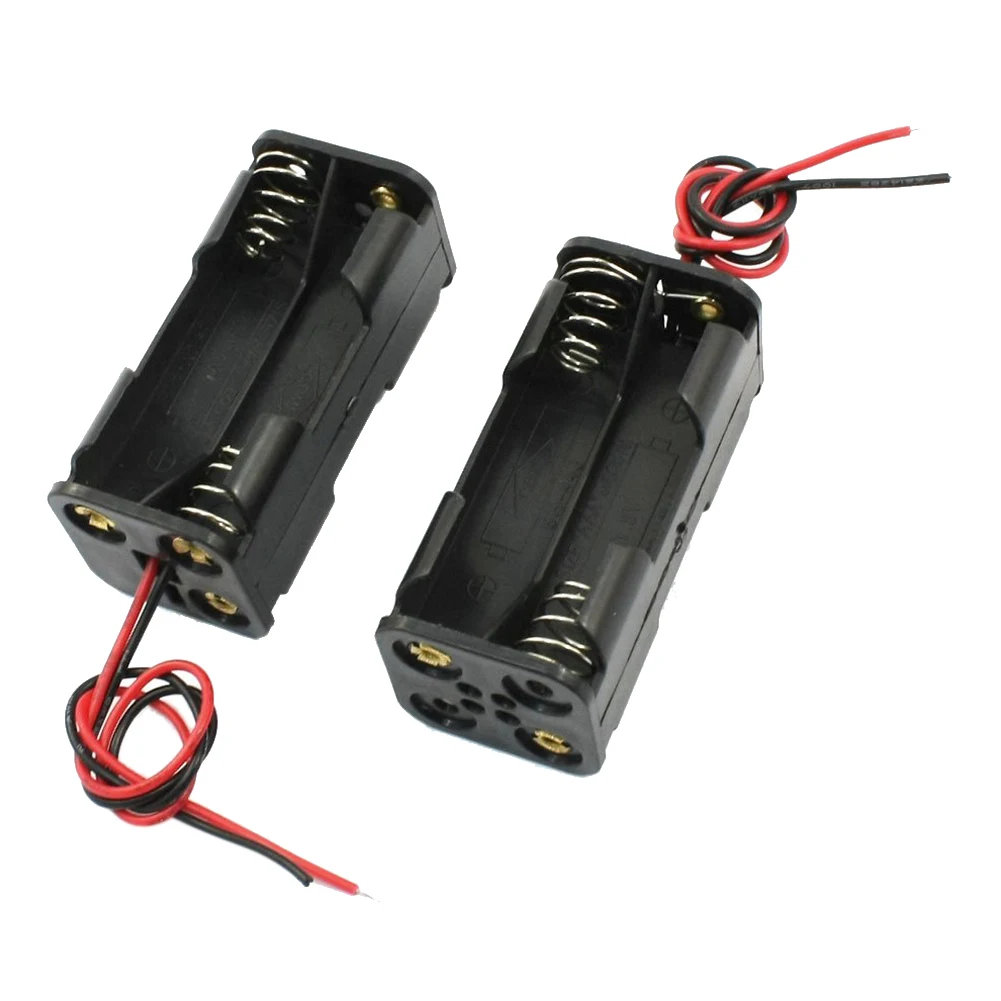
AliexpressOptional: one 3.7 volt Lithium-ion battery with holder, charger, & germanium diode Note: All parts with solder pins need to be spaced .1 inch apart (2,54 mm)
2 position terminal block, .1 inch pin spacing

EbayA Solder-able Breadboard, preferably double sided like this from SparkFun
(I believe double sided solder better, especially for those of us developing skills.)

AliexpressOR (Single Sided) BusBoard Solderable PC BreadBoard (SB404) at Jameco RFM69Hx radio transceiver, frequency determined by what's allowed in your region / country
(915 MHz for the U.S. & I believe 433MHz for Europe & 868MHz for UK)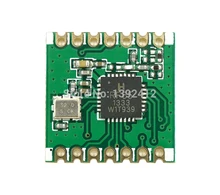 AliexpressATMEGA328P-PU microprocessor (integrated circuit or IC) AliexpressATMEGA328P-PU microprocessor (integrated circuit or IC)
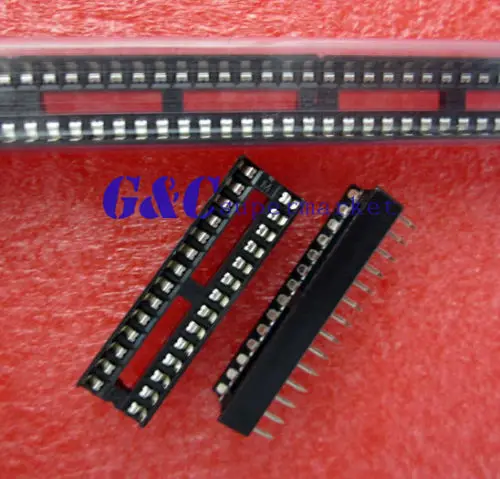
 Aliexpress 28-pin IC socket Aliexpress 28-pin IC socket
 Aliexpress22 gauge insulated wire (multi-colors ??) Aliexpress22 gauge insulated wire (multi-colors ??)
 AliexpressMCP1702 3.3v voltage regulator AND two ceramic 1 micro farad capacitors AliexpressMCP1702 3.3v voltage regulator AND two ceramic 1 micro farad capacitors
 Aliexpress Aliexpress

Aliexpress8 MHz Crystal AND two ceramic 22 pico farad capacitors to use with it Aliexpress Aliexpress

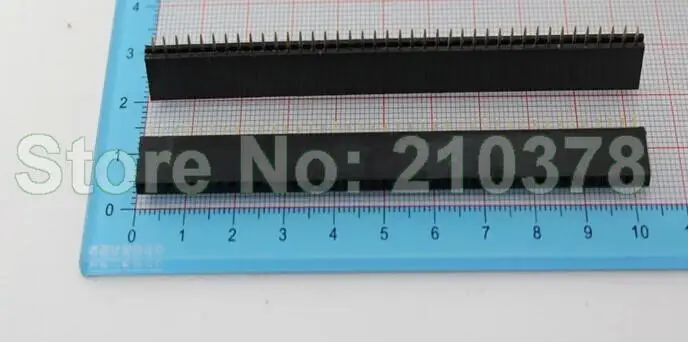
AliexpressAbout 30 Break Away Female Headers (.1" spacing), if like me, you want to plug in components like rfm69 transceiver & DHT11 sensor
 Aliexpress Aliexpress
A regular 5 volt Arduino Uno & a half solder-less breadboard (30 x 14 holes, .1 inch apart)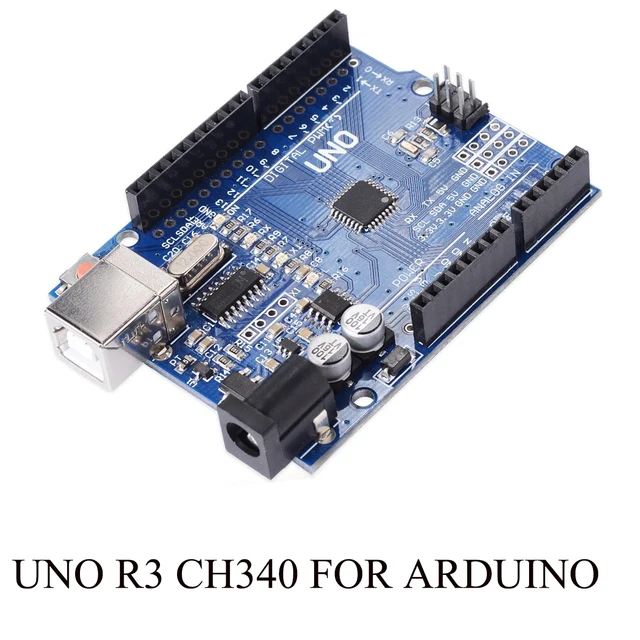 Aliexpress Aliexpress

Aliexpress
a Ethernet Shield W5100 Aliexpressa 16 MHz crystal & two 22 pico Farad capacitors Aliexpressa 16 MHz crystal & two 22 pico Farad capacitors
 Aliexpressone 100 nF (0.1 μF) capacitor Aliexpressone 100 nF (0.1 μF) capacitor
 AliexpressOne each of red, green, & yellow LED (& a 100 ohm or 220 ohm or 1 kilo ohm resistor for each) AliexpressOne each of red, green, & yellow LED (& a 100 ohm or 220 ohm or 1 kilo ohm resistor for each) Aliexpress Aliexpress Aliexpress AliexpressSome of these things I already have of an Arduino Upgraded Learning Kit. If everything is correct, only ask for the material and really start working  |
|
|
|
Post by papa on Oct 14, 2017 18:50:27 GMT
sunbloquer, you're brave to start with a more difficult project, like the mail box node. So far it looks like you are doing OK in following the thread I wrote about such a node. However, I want to be sure you realize that your mail box node will have no way to communicate with OpenHAB on the Raspberry Pi unless you build the RFM69 Gateway. For building the Gateway, see this link that I put in this mail box node post. For building a Gateway, you'll need an Arduino compatible that can send 3.3 volts through its digital pins (D2, etc) , like a Buono Uno that I regularly mention in my threads. You'll also need a W5100 Ethernet Shield to plug into the Buono Uno & an RFM69 radio. The RFM69 radio will be damaged by 5 volts coming through the digital pins of a standard Arduino Uno. I strongly recommend (before you make your mail box node) that you follow this step by step thread to build your first RFM69 Gateway & Node. If you can get these built & communicating with each other (usually a challenge for beginners), you'll have a good start for your mail box node to communicate with the Gateway. That step by step thread is the easiest I can make getting started with RFM69 devices. Making that first Gateway & Node will probably be difficult enough, but easier to troubleshoot than starting with a mail box node on a circuit board & a Gateway. At a bare minimum, I urge you to follow the step by step thread to build & troubleshoot the Gateway & the Bare Bones End Node. At least, follow the thread from the beginning through this post. If that all works, you'll have the Gateway to communicate with the mail box & other nodes. The parts from the Bare Bones End Node will be usable for other nodes. |
|
|
|
Post by greginkansas on Oct 15, 2017 0:57:37 GMT
|
|
|
|
Post by sunbloquer on Oct 15, 2017 10:56:42 GMT
You'll also need a W5100 Ethernet Shield to plug into the Buono Uno & an RFM69 radio. The RFM69 radio will be damaged by 5 volts coming through the digital pins of a standard Arduino Uno. Thanks dad, I already forgot the W5100 Ethernet Shield  |
|
|
|
Post by sunbloquer on Oct 15, 2017 10:58:30 GMT
It's a bit more expensive but I would not mind changing ... the problem is sending, to Spain 54 € = 54 $ + - Shopping in Spain 9,90 + 4,95 = 14,85 € For that price I have 6 from Aliexpress. But many thanks for the recommendation. I will have to be more careful when making connections  |
|
|
|
Post by papa on Oct 15, 2017 13:07:51 GMT
Yes, sunbloquer, the Adafruit RFM69 breakout board should work with a standard 5 volt Arduino Uno if you don't mind the added cost. I suppose board's solder holes are more apart than the RFM69 radio holes to make soldering some easier. How to choose between 3.3 volt Buono Uno compatible plus bare RFM69 radio AND standard 5 volt Arduino Uno plus RFM69 breakout board?? You can choose based on cost and how easy it is to get the products shipped to you. Thanks, greg, for the alternative. The 2 position terminal block is for attaching (& detaching) battery box wires to the circuit board of the mail box node. If you solder the battery box wires to the power rails of the mail box node circuit board, you can skip getting the 2 position terminal block. If like me, you prefer ease of assembly & disassembly, you can get the terminal block.  << 2 position terminal block The distance between the terminal block's pins should be .1 inch or 2.54mm so both pins will insert into the circuit board of the mail box node. |
|
|
|
Post by sunbloquer on Oct 16, 2017 6:16:40 GMT
All right. For now I see everything clear. I already ordered everything necessary for the beginning that it will take a little while to arrive. Better, that will give me time to study well all the documentation of the forum and annoy less. Thank you very much, I will document the whole project and if you like, I will do a translation of the most important Spanish, gateway, nodes .... etc.  |
|
|
|
Post by papa on Oct 16, 2017 14:08:11 GMT
You're welcome, sunbloquer. Yes, your studying the documentation here would be good. That way, you can probably avoid some problems & have less frustration. Your documentation is welcome here, especially anything you do or learn that is different from the documentation already on this forum. For example, if you use the Adafruit RFM69 Breakout Board with a standard Arduino Uno, what worked well & what added challenges did it cause? Your translating to English would also be good. Based on my experience with the projects, I may tweak what you write. Thanks for including aliexpress sources for the parts lists. That could help others. By the way, if you had doubts about the 24AWG multi-colored wires, they should work. I sometimes use that gauge of wire. Just remember that 24 gauge wire resists current flow somewhat more than 22 gauge. Longer wires also increase resistance to current flow. Looking closer at your parts list, I see you chose a different circuit board. The solderable breadboards like from Sparkfun are not only double sided, but they allow one to mount an integrated circuit (IC) chip in the middle & the IC pins are already connected to strips of solder holes. I believe there are no built-in connections between the solder holes of your circuit board. That can work, but takes much more soldering. This item at aliexpress looks similar to the Sparkfun board, but appears to be a single-sided strip board. This search on eBay shows some boards similar to the Sparkfun board, but again they are single-sided. In the original documentation, I mentioned this single-sided board from Jameco. |
|
|
|
Post by sunbloquer on Oct 20, 2017 13:57:31 GMT
Hello, a few doubts, there is something that I still do not understand and I set the example of the mailbox project. I have reviewed the schematics and I am looking at the documentation and I think I am doing a tremendous job. The manager of the entire sensor networkRaspberry Pi ---> Ethernet ---> OpenHab + MQTT ---> running 24/7/365 ---> PowerSupply-UPS GatewayWhat receives information from the sensors and transfers it to the Rpi ---> Ethernet ---> running 24/7/365 ---> PowerSupply-UPS Buono UNO 3,3v -------> running 24/7/365 Ethernet Shield ---> Ethernet Node EndBattery box RFM69..........sensors...........open/close doors, etc, etc Who communicates with Buono Uno via Radio I think I'm right, or is every end node should have a Buono UNO with RFM69? I do not see any site to do or what the ATMEGA328P-PU microprocessor this web has something to do with www.homautomation.org/?Thanks |
|
|
|
Post by sunbloquer on Oct 20, 2017 18:02:08 GMT
I had to direct to Uber Home Automation W / Arduino & Pi, without photos I am nobody :-( Come on, each node with the sensor/s must have a BUONO Uno, I miss one on the shopping list  |
|
|
|
Post by papa on Oct 20, 2017 20:36:04 GMT
sunbloquer, I believe you are mostly understanding. Let me clarify some things you may be missing. The RFM69 Gateway needs a Buono Uno, a W5100 Ethernet shield, RFM69 radio & the other parts. The Bare Bones RFM69 Node that I recommend you start with needs a Buono Uno, an RFM69 radio, & (if you take it farther, the other parts). For nodes NOT powered by battery, you also need a Buono Uno, an RFM69 radio, etc. However, for the battery powered node itself, you do NOT need a Buono Uno (Arduino Compatible). For that node, the constructed circuit board with ATMEGA328P-PU microprocessor is the 3.3 volt Arduino compatible that the node needs. << You are making a Do IT Yourself Arduino that runs at 3.3 volts through the digital pins. sunbloquer: "I do not see any site to do or what the ATMEGA328P-PU microprocessor" papa: This post shows how to use an Arduino to program the ATMEGA328P-PU microprocessor with the Mail Box node program. papa: This shows how to build the battery powered node & how to use a regular Arduino to program the ATMEGA328P-PU microprocessor with the Mail Box node program. |
|
|
|
Post by sunbloquer on Oct 21, 2017 10:41:10 GMT
OMG  OK, now I understand. If there is an AC plug, you can use BUONO UNO+RFM69, in case the sensor to be used does not have the possibility or you do not want to use alternating current it is necessary to use the board with the ATMEGA microprocessor+RFM69 and programming for the type of sensor that is required since it does the limited function of a BUONO. Sorry for the inconvenience, there is so much, so much documentation and so much link to follow that not knowing this world one gets lost   |
|
|
|
Post by papa on Oct 21, 2017 16:06:26 GMT
papa: sunbloquer, I tweaked & labelled your image from the last post. This image is another way to map the RFM69 network. I believe the map in this post of the RFM69 Network might be helpful to understanding the connections. Click on image for larger view.  sunbloquer: "OK, now I understand. If there is an AC plug, you can use BUONO UNO+RFM69, in case the sensor to be used does not have the possibility or you do not want to use alternating current it is necessary to use the board with the ATMEGA microprocessor+RFM69 and programming for the type of sensor that is required since it does the limited function of a BUONO." papa: Yes, I believe you are understanding it better. Use the Buono Uno, etc. to make an AC-powered node. OR use an ATMega chip, etc on a circuit board for a DC-powered node. Properly built & programmed, both can connect to the RFM69 Gateway. Then through the Gateway, the nodes communicate with OpenHAB / MQTT on the Raspberry Pi or other network-connected computer.sunbloquer: "Sorry for the inconvenience, there is so much, so much documentation and so much link to follow that not knowing this world one gets lost." papa: True, even when simplified as much as I can so far, this project is challenging. (& translating between English & Spanish must add to difficulty.) That's why I keep recommending one to start with ESP8266 devices (that need no gateway) or to start with the most simple network of RFM69 Gateway & Bare Bones RFM69 Node. RFM69 Gateway plus Bare Bones RFM69 node (using a Buono Uno) may be challenging to troubleshoot, but easier than RFM69 Gateway plus battery-powered node. A Buono Uno node can show feedback on the Arduino IDE's Serial Monitor, but a battery-powered node cannot do that. |
|
|
|
Post by sunbloquer on Oct 22, 2017 11:39:57 GMT
Now if it is very clear for a super noob. Thank you papa for taking the time to clarify my doubts.  papa: You are welcome, sunbloquer. Our dialog in this thread my help others who come to this forum. papa: You are welcome, sunbloquer. Our dialog in this thread my help others who come to this forum.
Your paying attention to the big picture & to details should help you succeed. Enjoy and be patient with yourself.
Stay in touch about your progress.
|
|
|
|
Post by sunbloquer on Dec 24, 2017 14:02:56 GMT
Finally I have all the necessary components to start this great project. Some things in China seem to be coming alone. I will keep informed about progress or not progress  
|
|
|
|
Post by papa on Dec 26, 2017 2:25:35 GMT
sunbloquer, if you have waited for parts to arrive since October, you are VERY patient. Good to hear more from you. Stay in touch. PS Maybe you noticed that I've recently been collecting & tweaking my RFM69 Gateway documentation in a new thread. Perhaps, it will be useful to you & others, especially when I finish it. I hope it helps clarify making this essential aspect of the RFM69 network. Find the new Gateway thread here. |
|
|
|
Post by sunbloquer on Jan 4, 2018 18:14:08 GMT
Hi papa, slow but sure, almost sure Hello, I already have all the connections made and I'm starting with Openhab. Install openHABian 1.4 in an Rpi ( openHAB2) and I'm following the homeautomation.proboards.com/thread/112/raspberry-pi-install-openhab-mosquittoThe path of the folders I suppose will be the same or similar. $ sudo apt-get install openhab-addon-persistence-logging obsolete in openHAB2 community.openhab.org/t/where-did-logging-persistence-disappeared-in-openhab-2-b3-offline/14381The rest of the mentioned ones were installed from the panel http://openhabianpi:8080/paperui/index.html#/extensions When I finish with everything I put a guide for dummies  Currently ---> move openhab-papa4.zip to openHABian  Structure Directory Structure Directory
/etc/default/openhab2 --- service configuration ---- /etc/mosquitto/etc/openhab2 /html /icons /items /persistence /rules /scripts /services/addons.cfg dashboard.cfg mail.cfg mqtt.cfg …...etc /sitemap /sounds /things /transform
/home/openhabian/opt/openhabian /srv /openhab2-addons /openhab2-conf/html items persistence rules scripts services …...etc /openhab2-logs /openhab2-sys /openhab2-userdata /usr/share/openhab2 /addons /runtime /var/log /mosquitto /openhab2 Thanks for your time |
|
|
|
Post by papa on Jan 4, 2018 19:40:58 GMT
Greetings, sunbloquer, good to have an update from you & I rejoice you are making progress.
sunbloquer: "When I finish with everything I put a guide for dummies."
papa: A new guide on installing OpenHAB 2 & Mosquitto would be wonderful, but perhaps we could call it "A Guide for Beginners." :-)
|
|
|
|
Post by sunbloquer on Jan 5, 2018 17:07:34 GMT
All right. Continuing the procedure described above there are a couple of changes in OPENHAB2 The webapps folder disappears, being replaced by /etc/openhab2/html/ community.openhab.org/t/webapps-folder-is-discontinued-howto-make-files-available-through-http/3159I did $ sudo cp /home/openhabian/Downloads/webapps/images/temperature.png /etc/openhab2/html/webapps/images/temperature.png
In the instructions of the post I follow homeautomation.proboards.com/post/964/thread there is a writing error - for _ or viceversa The image name is comfo rt_level.png and command sudo cp /home/[user]/openhab-papa4/webapps/images/comfo rt-level.png /usr/share/openhab/webapps/images/comfort-level.png I think all this has gone well, if I agree to http://openhabianpi:8080/basicui/app?sitemap=My  I suppose if I see that, everything has gone to the correct routes. The data will not show them because the node does not exist jejejeje  OK homeautomation.proboards.com/post/979/thread I had not reached this message [20:09:48] openhabian@openHABianPi:~$ tail -f /var/log/openhab2/events.log
2018-01-04 15:08:55.327 [home.event.InboxAddedEvent] - Discovery Result with UID 'ntp:ntp:local' has been added.
2018-01-04 15:11:07.731 [thome.event.ExtensionEvent] - Extension 'binding-weather1' has been uninstalled.
2018-01-04 18:45:26.975 [thome.event.ExtensionEvent] - Extension 'persistence-rrd4j' has been installed.
2018-01-04 18:45:27.112 [thome.event.ExtensionEvent] - Extension 'binding-weather1' has been installed.
2018-01-05 16:21:26.601 [ome.event.ItemCommandEvent] - Item 'Act_Node02' received command ON
2018-01-05 16:21:27.239 [vent.ItemStateChangedEvent] - Act_Node02 changed from NULL to ON
2018-01-05 18:08:44.428 [ome.event.ItemCommandEvent] - Item 'Act_Node02' received command OFF
2018-01-05 18:08:44.571 [vent.ItemStateChangedEvent] - Act_Node02 changed from ON to OFF
2018-01-05 20:07:30.866 [ome.event.ItemCommandEvent] - Item 'Act_Node02' received command ON
2018-01-05 20:07:31.452 [vent.ItemStateChangedEvent] - Act_Node02 changed from OFF to ONI entered the time data in openhab.cfg but I do not observe that it collects any data in outside temperature, there are empty fields weather:apikey.Wunderground=604xz54269a5ede3
#weather:apikey.Hamweather=
#weather:apikey2.Hamweather=
# location configuration, you can specify multiple locations
# Find your location's latitude & longitude numbers
# at www.distancesfrom.com/Latitude-Longitude.aspx
# Relace the xx.xxxxxx's below with those numbers (some may have negative sign)
weather:location.home.name=home
weather:location.home.latitude=43.5307345
weather:location.home.longitude=-5.543119
weather:location.home.provider=Wunderground
#weather.location.home.woeid=
# code your desired language below
weather:location.home.language=en
#weather:location.home.updateInterval=10 [default interval]
weather:location.home.updateInterval=5My next steps will be homeautomation.proboards.com/post/2752/thread Prepare to Program the Gateway next homeautomation.proboards.com/post/2063/thread (more easy) or homeautomation.proboards.com/thread/158/battery-powered-node-mailbox-etc |
|
|
|
Post by sunbloquer on Jan 9, 2018 14:58:35 GMT
|
|
|
|
Post by papa on Jan 9, 2018 19:10:57 GMT
Your results look good so far, sunbloquer. Congratulations & wishing you continued success with the next steps.
It's also good to hear that the forum's documentation was helpful for you.
Your experience as a successful beginner could be helpful to others in the future.
|
|
|
|
Post by sunbloquer on Jan 10, 2018 10:17:30 GMT
Hi A doubt with the tilt switch. Doing a search in Aliexpress I find that there are several models. Does anyone serve? Any recommendation?     I guess everyone will do the same function........ |
|
|
|
Post by papa on Jan 10, 2018 13:02:44 GMT
sunbloquer, I've only used one kind of tilt switch, which came in a variety pack of parts. It is encased in plastic & has 4 terminals (only 2 terminals are used). This tilt switch sounds like it has a rolling metal ball inside that closes the switch. I believed I pictured the switch in a post about a mail node.
I would think that different kinds of tilt switches function the same electrically.
Personally, I would avoid your last option above. It looks like it has glass container (fragile ?) & it may be the old style tilt switch that has a big drop of (toxic) mercury inside.
Especially if you are using the tilt switch for a mail box node, I recommend something that is as small & unobtrusive as possible (just a switch with no breakout board), but not fragile.
I'd avoid mercury & go with switches that mention a ball.
|
|
|
|
Post by sunbloquer on Jan 11, 2018 14:48:58 GMT
Thank you papa, in the end I bought a couple of these 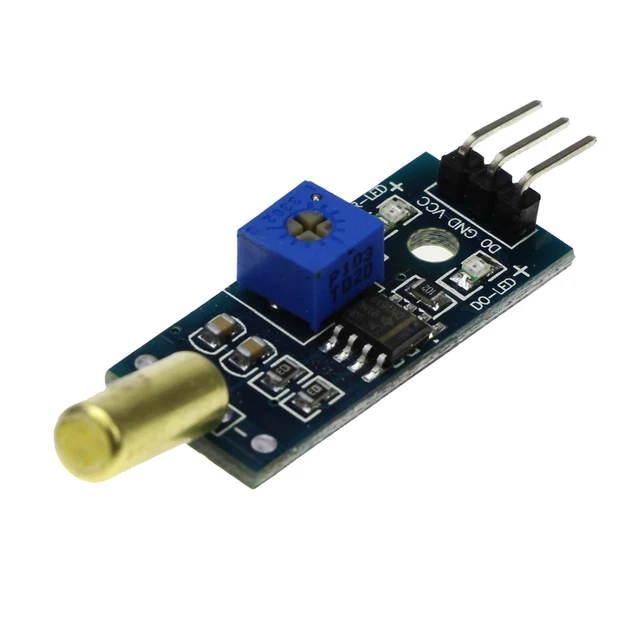 |
|
|
|
Post by papa on Jan 11, 2018 16:46:52 GMT
Good to hear about your progress on the Mail Box Node, sunbloquer. I have built working models of the node, but never yet deployed them in a mail box. I've seen videos of people like Eric Tsai & Ben Heck (Element 14) making such devices. Without checking, I've wondered how postal employees would react to seeing electronics attached to a mail box & wondering if they were dangerous. I'm also not sure about the official regulations. I thought I should mention those concerns. Perhaps someone has already checked & can reassure me. |
|
|
|
Post by sunbloquer on Jan 24, 2018 14:19:20 GMT
Hello, I'm still working, today I received the sensors that I needed so maybe one day I just did it. My node. In the end I'm with the node that you made (because of the connections) now after doing this I know how everything is connected. I made an arduino standalone that they call YABBAS, which in turn derives from the Paperduino...., I'm missing a couple of things to finish it, once I finish it I put Fritzing's skecht here.  Here the mailboxes used are different, the postman does not see the inside, well, at least it's the one that I use   A greeting friends |
|
|
|
Post by papa on Jan 24, 2018 20:22:08 GMT
Greetings to you, sunbloquer. Good to hear from you on the current stages of your project. Thanks for sharing images & other documentation. Your do it yourself Arduino looks nicely done.
|
|